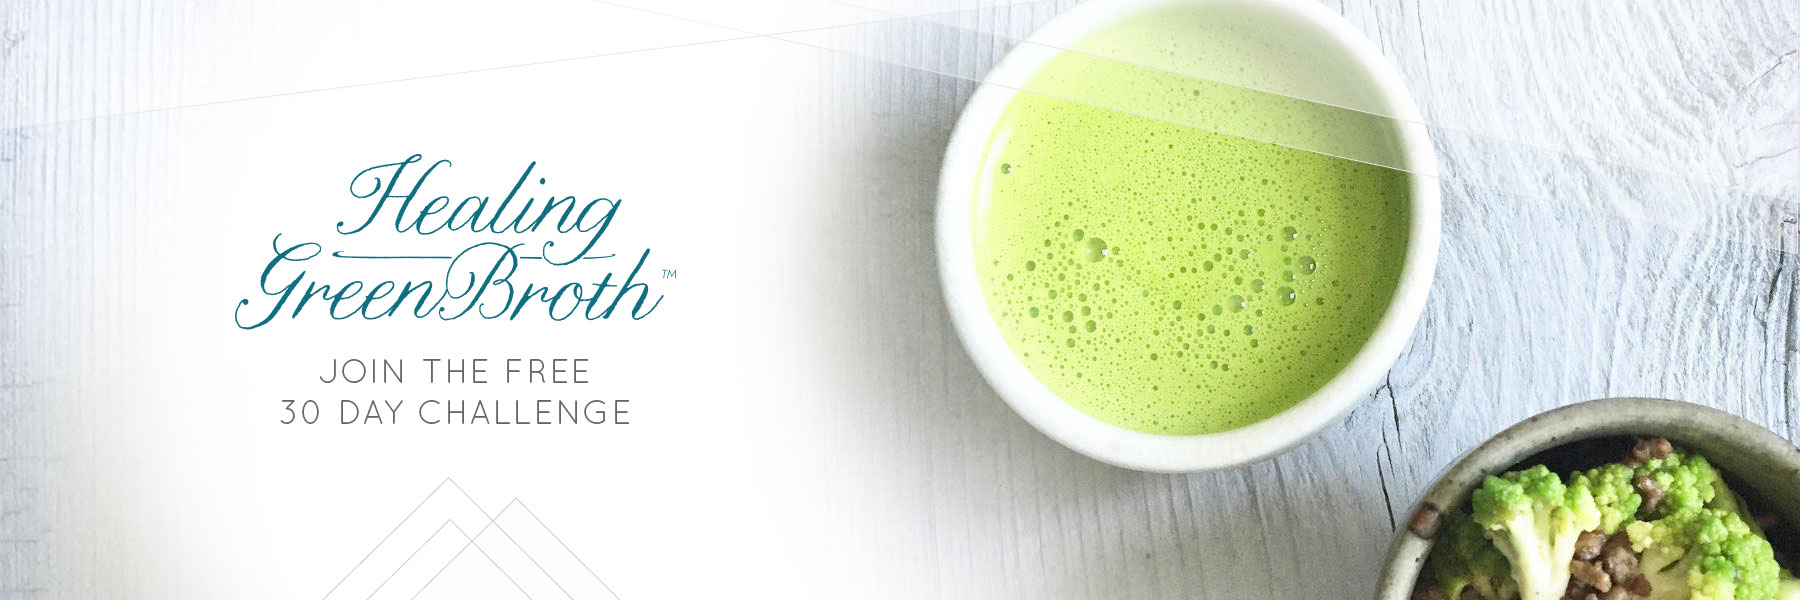
GETTING READY FOR THE HEALING GREEN BROTH 30-DAY CHALLENGE™
Thank you so much for signing up for the Healing Green Broth 30-Day Challenge!
I’ll be sending the first shopping list and recipes in a few of days, but before then I wanted to give you a heads up on the tools and ingredients you’ll need to make bone broth and to buzz it up into frothy, nourishing Healing Green Broth. (If you’re chomping at the bit and ready to jump in this very day, here’s the original recipe.)
Before you start, take note of your weight, energy level throughout the day, skin texture, and digestion. I created this challenge so people could really see the benefit of adding a blast of nutrients to their daily diet. There are many reasons to prepare food at home, but to me the most important are maximum nutrient density and the ritual of preparing food and sharing it with those I love. I see Healing Green Broth as an introduction to shifting the way we think about food, away from “tastes good, easy to acquire, eliminates hunger” and toward “nourishes my body, improves my health and energy, tastes amazing.”
How does this all work?
First of all, the Healing Green Broth 30-Day Challenge is meant to be FUN. Bone broth is all the rage for a reason – on its own it just tastes damn good, is filling without being heavily caloric, feels comforting and soothing to drink, and delivers a nutritional punch.
Add the vitamin, mineral, protein, fiber, and anti-oxidant boost from fresh greens and herbs, citrus, collagen, and healthy fats and seriously…vroom!
During the challenge, once/week for 4 weeks I will email you:
- 1 bone broth recipe that will yield enough broth to make 7 servings of Healing Green Broth. (If you’ll be making it for 2 or more people, adjust accordingly.)
- 2 Healing Green Broth flavor variations to try during the week
- shopping list for the week
The basic groove…
Choose one day each week to make bone broth – you have three options for simmering your bones. If you make it on the stove top, it will take 2-3 hours total (10 minutes of prep, 2 hours of simmering, and 20 minutes of straining, pouring into jars, and washing the stockpot). If you prefer using a slow cooker, it will take 8-9 hours total (10 minutes of prep, 8 hours – overnight works great – of slow cooking, 20 minutes to finish). If you decide to use an Instant Pot (electric pressure cooker) or stovetop pressure cooker, plan on 1 1/2 hours total (10 minutes of prep, 1 hour or less of pressure cooking, 20 minutes to finish).
If you’re not an experienced cook, making bone broth at home can seem a bit daunting but I promise, it’s really quite easy, especially with the basic tools I outline below.
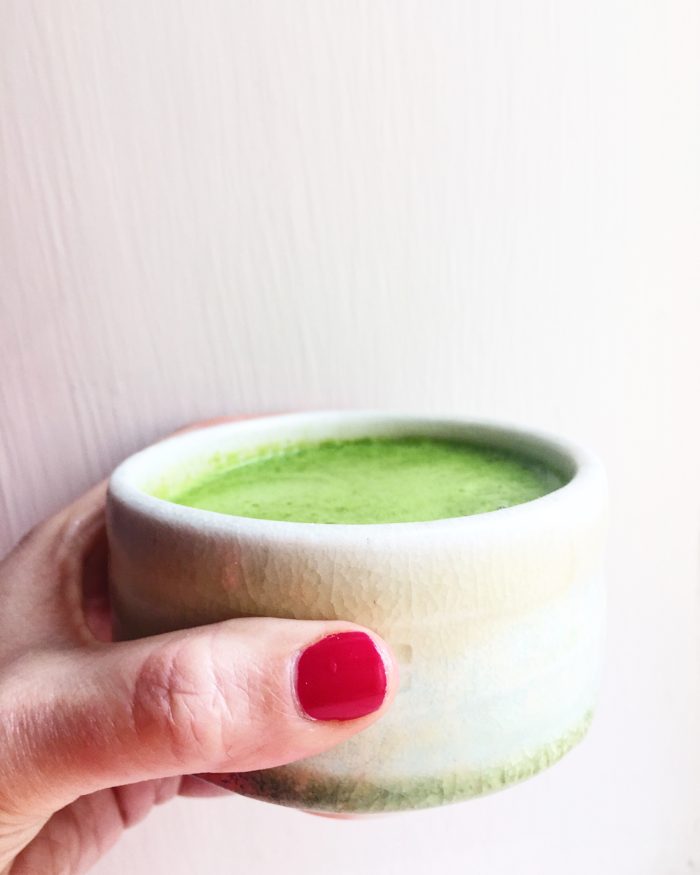
After you’ve made broth, you’ll make a mug of Healing Green Broth once each day by heating 1 cup of broth and blending it with raw greens, herbs, seasonings, fat, collagen, and citrus. Plan on 10 minutes total of prep and clean up – that’s it! After you’ve made bone broth, there’s no active “cooking,” just heating broth and blending.
When should you enjoy Healing Green Broth?
It’s completely up to you, but if you’re trying to cut back on sugar, booze, and/or unhealthy snacks, it can be really helpful to have the broth at your most peckish time of day.
A mug of Healing Green Broth has around 250-300 calories, which makes it perfect as a substantial snack, a light meal, or to fill out a meal. I personally love it as part of my lunch, especially after a workout. I also enjoy it for a late afternoon snack, a time of day when I really need a boost and don’t want it to come from alcohol, sugar, or crackers.
That said, #breakfastsoup is a popular trend on Instagram because a high-protein, savory start to the day can mean better energy and better (less sweet or processed) food decisions for the rest of the day. When I have a big day ahead of me, I love starting my morning with Healing Green Broth. Experiment with different times and see what you think.
Can you whir up a batch in the morning and take it to work in a thermos?
YES, it travels pretty well. It loses a bit of its vibrant color, and probably some of its anti-oxidant punch, but it will still be nutritious and a stir or gentle shake will re-emulsify it nicely. I like this little Hydro Flask, it really keeps hot liquids hot for a few hours.
Can I buy bone broth instead of making it at home?
Of course you can, although making it yourself is more cost-effective. That said, there are plenty of times I’ve picked up high quality bone broth from my local butcher and been very happy to have that option. Mass-produced, grocery shelf bone broth doesn’t taste very good, doesn’t gel when cold, and isn’t going to yield a tasty, nutritious mug of Healing Green Broth. I have better luck with local restaurants and butcher shops who really know how to make good stock. (I can’t speak to purveyors outside of Minneapolis/St. Paul, but if you are local to the Twin Cities, Lowry Hill Meats, Foxy Falafel, and Clancey’s sell excellent frozen broth on site.)
Let’s talk about BLENDERS…
You don’t need fancy equipment to make Healing Green Broth but you do need a decent blender: an immersion blender is not powerful enough to break down the greens and herbs and emulsify the ingredients into a smooth and foamy puree. And the deliciousness is in the smooth and foamy puree!
What’s a decent blender? Any bowl blender that can break down ice is a good bet. A tight-fitting lid (and a base that doesn’t leak) are important because you’ll be blending hot liquid.
That said, here are blenders that my test group broth bosses used successfully (there are affiliate links throughout the list below, which means if you purchase items directly from these links, I receive a small commission):

At around $80, this Magic Bullet NutriBullet blender has a low price point but delivers enough power to get the job adequately. It is also powerful enough to crush ice for smoothies.

This basic Vitamix 5200 Series model is a beauty of an appliance, no doubt, with a price that reflects the quality and engineering. I own the upgraded model, below, but I teach classes with this model and we make everything in it. The taller blender bowl doesn’t fit under all cabinetry so if you want to store it on your counter, make note of the dimensions.

This more powerful Vitamix 7500 Series model is truly an investment, but I use mine for absolutely everything – smoothies, super fluffy hummus, plantain tortillas, crepe batter, custards, on and on, and of course Healing Green Broth. The bowl on this model is shorter and wider so it fits under my cabinets. I purchased and most often use the 32-ounce wet blade bowl (it’s a smaller pitcher than what comes with the base; I use both bowls). If I calculated per use cost over the several years I’ve owned it, I’ve certainly squeezed out every dollar I spent on it.

There are diehard Vitamix fans, and there are diehard Blendtec fans. Both appliances are powerful, reliable, sturdy, and incredibly useful. The wider base of this Blendtec Total Blender makes it easier to clean in the sink (I blend hot water in my Vitamix which is also easy to do).
Other handy equipment suggestions for making bone broth:

If you don’t already have one, a stockpot with a cover is an indispensable kitchen tool, for making broth of course, but also soups and pasta. This is an 6-quart pot, a handy mid-size, easy to store, oven-safe, and inexpensive.

If you like the idea of setting up your broth at night and letting it cook while you sleep, or putting it together in the morning and letting it simmer while you’re at work, a slow cooker is a great option.

I love my Instant Pot combo pressure/slow cooker for making bone broth in an hour. I’m not a kitchen gadget person but this workhorse is an exception. I make broth in it, and also braise meats, cook beans, boil eggs, and make soups. If you prefer to keep cooking smells to a minimum, making broth in an Instant Pot is nice because it cooks for such a relatively brief period of time. Don’t worry about not using your Instant Pot often enough – there are more and more Instant Pot recipes and cookbooks being published every week because it’s an easy and fast appliance to use.

The cone shape of a chinois strainer fits nicely into a pitcher (below), making straining broth easy. I add an additional layer of cheesecloth for the clearest broth.

I like straining my broth right into a measuring pitcher. I can see exactly how much I have, and it’s easy to pour into jars. I use this same pitcher to measure water for making broth.

I store bone broth in wide-mouth glass mason jars because I avoid storing food in plastic whenever possible. Wide-mouth jars work best because they’re stackable, easy to clean, and frozen broth can slip right out of the jar after just a bit of defrosting. Yes, that means that I freeze broth in glass jars – the trick is to cool the broth to room temperature and leave head room for the broth to expand as it freezes. (Hot jars put directly into the freezer will crack, and over-filled jars will pop the tops.)

I use Vital Proteins Collagen Peptides, but Great Lakes Collagen Hydrolysate is also an excellent product, at a lower price point. I use powdered collagen to add protein to many things and soon you will too – smoothies, Bulletproof coffee, crepes, and custards to name just a few. It’s flavorless, easy to digest, and a very allergen-friendly source of protein. Anecdotally, collagen protein and bone broth fans (me included) swear by the improvement in smoothness of their skin and in their digestive health.

MCT (medium-chain triglyceride) oil is derived from coconut and is a terrific source of energy (it’s been made rather famous as a component of Bulletproof Coffee). It’s also quite satiating. Start with a teaspoon and work your way up to a tablespoon (it takes a few days for your digestion to adjust to MCTs). If you find that you like how MCT oil makes you feel, you can add it to smoothies and salad dressings (it’s flavorless). Full disclosure: I’m allergic to coconut so I make Healing Green Broth without MCT oil. I do love how it makes me feel, however, and would use it if I could, which I why I include it in the recipe.
Last thoughts:
I will be sending the Week One Healing Green Broth 30-Day Challenge grocery list and recipes in a week, as well as a link to a private Facebook group, where you can ask questions, share photos, and where I’ll post bonus recipes. Before then, please follow @healinggreenbroth on Instagram. And share the signup with friends or family you think might also enjoy the Challenge!
I’m honored and excited that you’re jumping in to the Healing Green Broth 30-Day Challenge. Please let me know if you have questions.
Broth on, broth bosses.
xoxo Stephanie